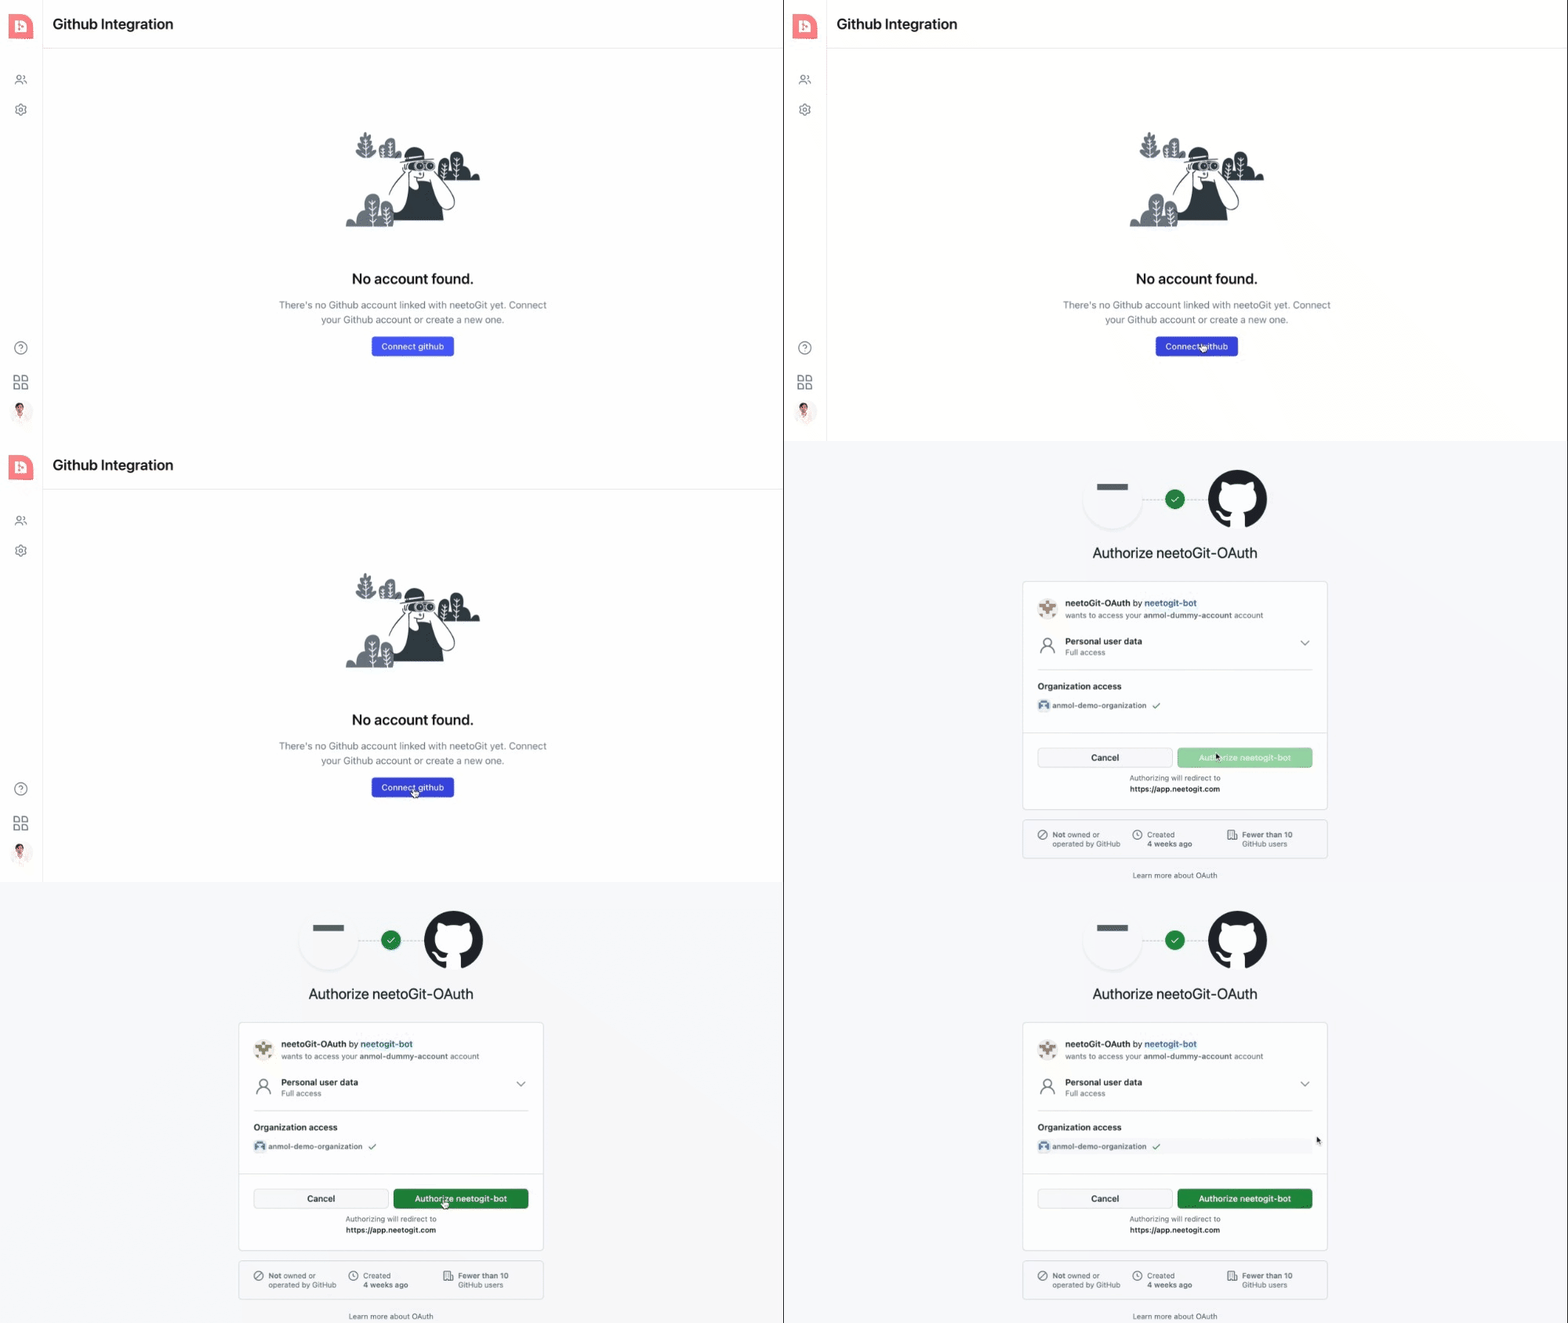
In order to enable NeetoGit features in your repositories, you first need to connect your GitHub account to NeetoGit by installing the NeetoGit Github app and granting the necessary permissions.
Click on the
connect githubbutton. You will be redirected to GitHub, where you might be prompted to log in if you are not already logged in. After logging in, GitHub will ask you to authorize NeetoGit-OAuth.
-
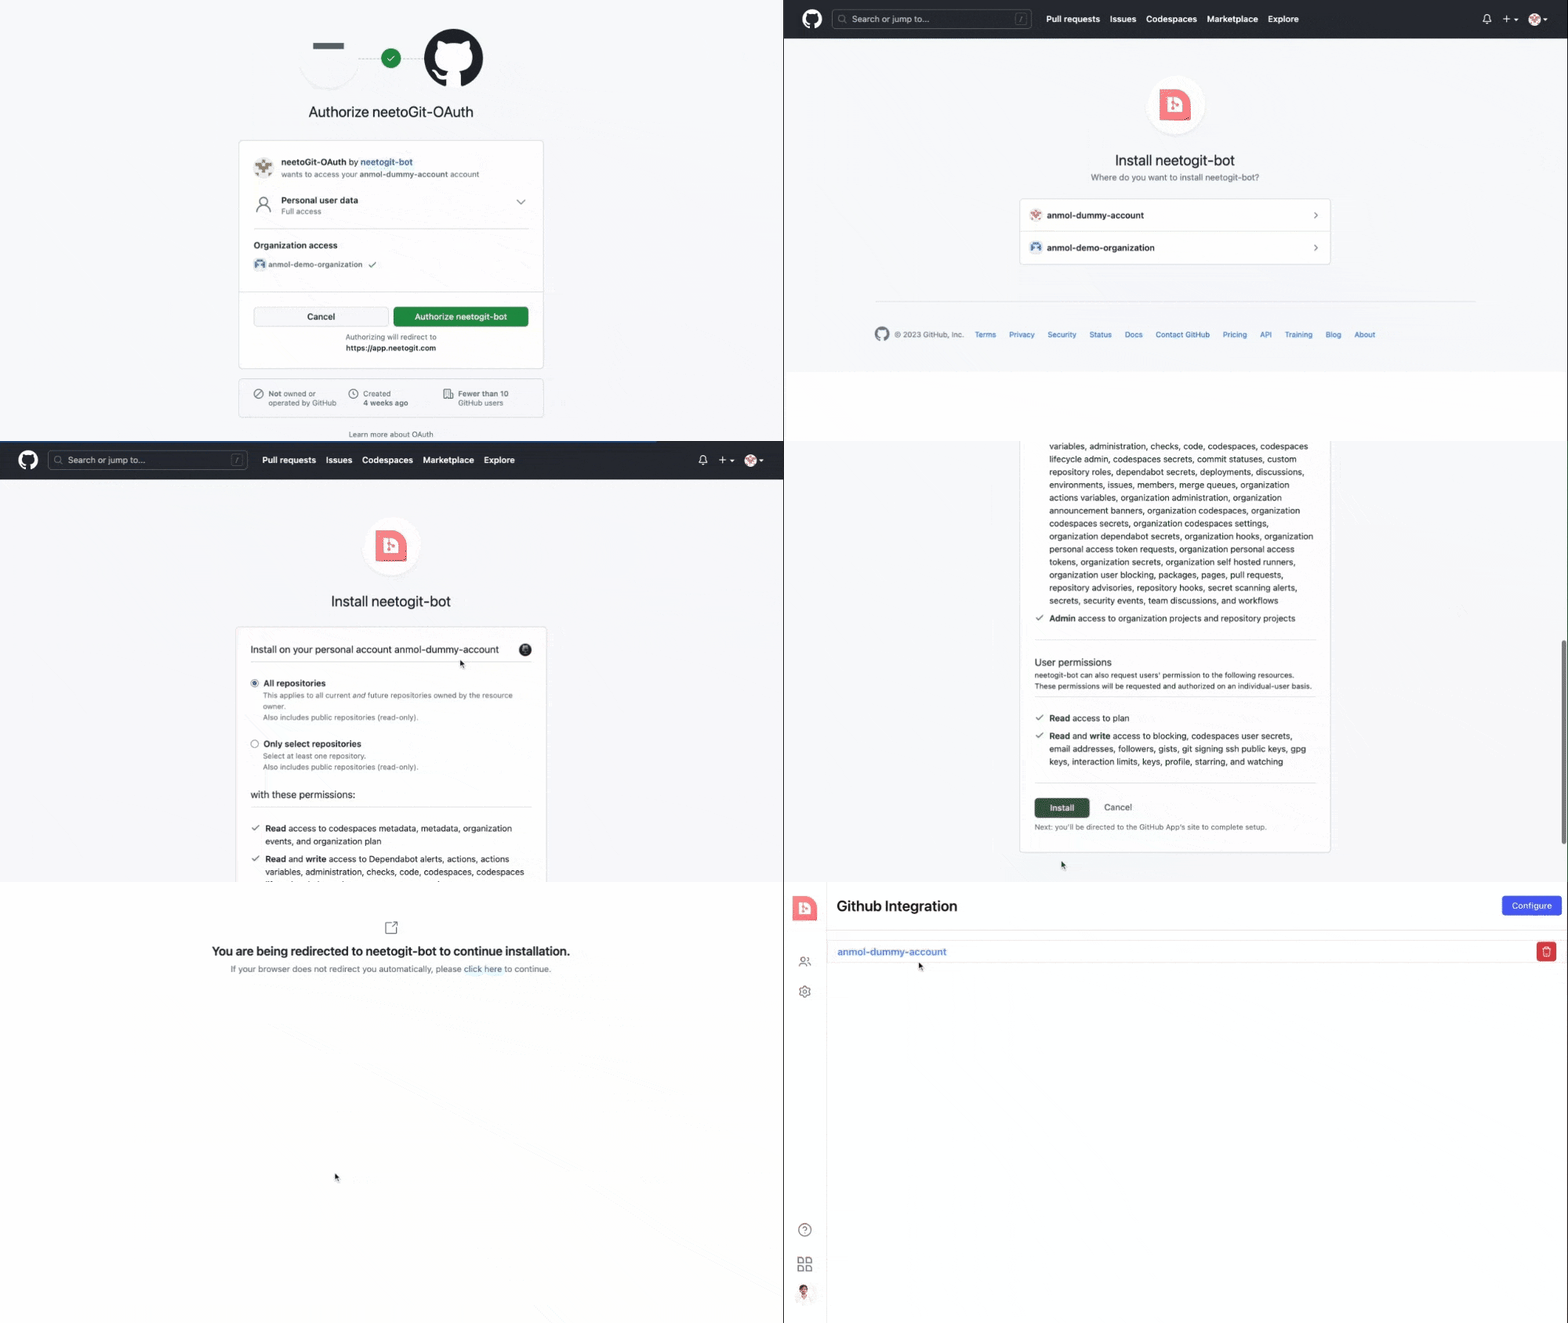
After the authorization process is complete, GitHub will redirect you to the GitHub app installation page. From there, you will need to install the NeetoGit-bot GitHub app in a specific namespace.
Note: If you choose to install NeetoGit-bot in all repositories of a namespace, any repository that you create in the future will also have NeetoGit enabled.
-
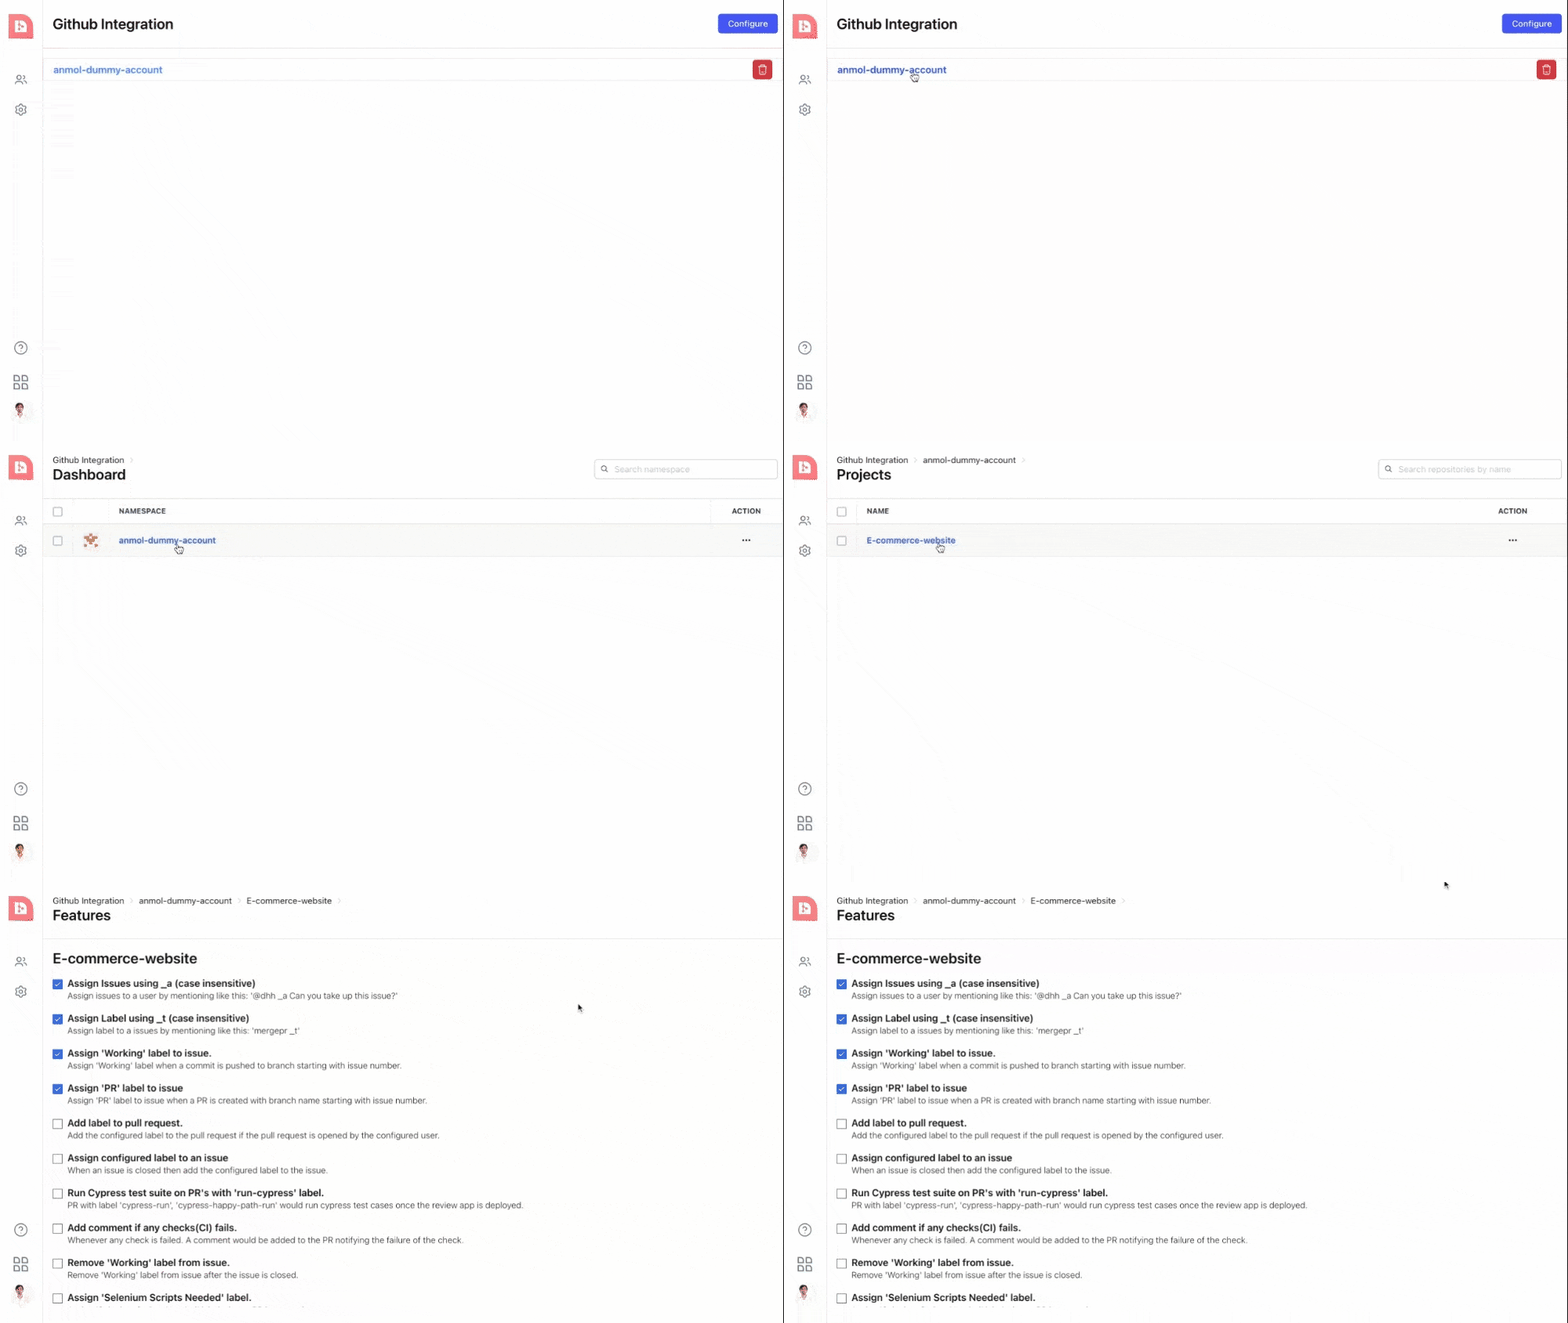
Once you have successfully installed NeetoGit-bot in a namespace, GitHub will redirect you back to NeetoGit. Now you should be able to see your connected GitHub account, the namespaces that you have connected, and the projects associated with NeetoGit's default features enabled.


